Hello Everyone!! This post shares the steps to Connect a Wireless Mouse To Windows 10. A wireless mouse uses Bluetooth to connect to your computer.
If your computer does not have Bluetooth facility, purchase a Bluetooth adapter or select a wireless mouse with a USB dongle that acts as a receiver.
So, let’s see the steps to connect a wireless mouse to a computer having Bluetooth facility.
Must Read: How To Take Screenshot On Windows 10
Step 1
To start with the steps, you will have to open Bluetooth menu which is present in the settings. Click on the Start button and then click on the Gear icon. You can also use shortcut key Win + I.
Step 2
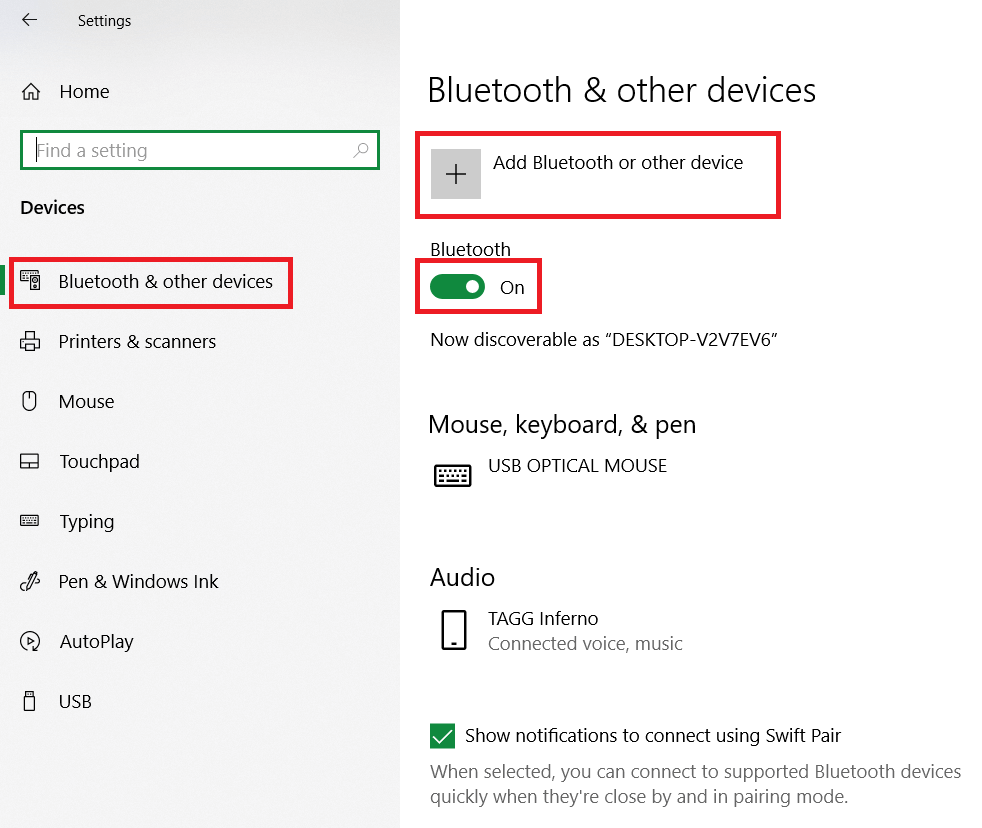
After you have opened Settings, click on Devices.
Step 3
From the left-sidebar, click on Bluetooth & other devices.
Now, look turn your Bluetooth ON if it’s OFF. Click the + icon marked with Add Bluetooth or other device.
Step 4
A popup window will now appear on your screen. Choose Bluetooth from the three options.

Now, follow the steps of the wizard. You’ll need to put your mouse in pairing mode and then click on its name to connect it with your computer. So, these were the steps to Connect a Wireless Mouse To Windows 10. If you have any doubts/suggestions write them down in the comment section below.